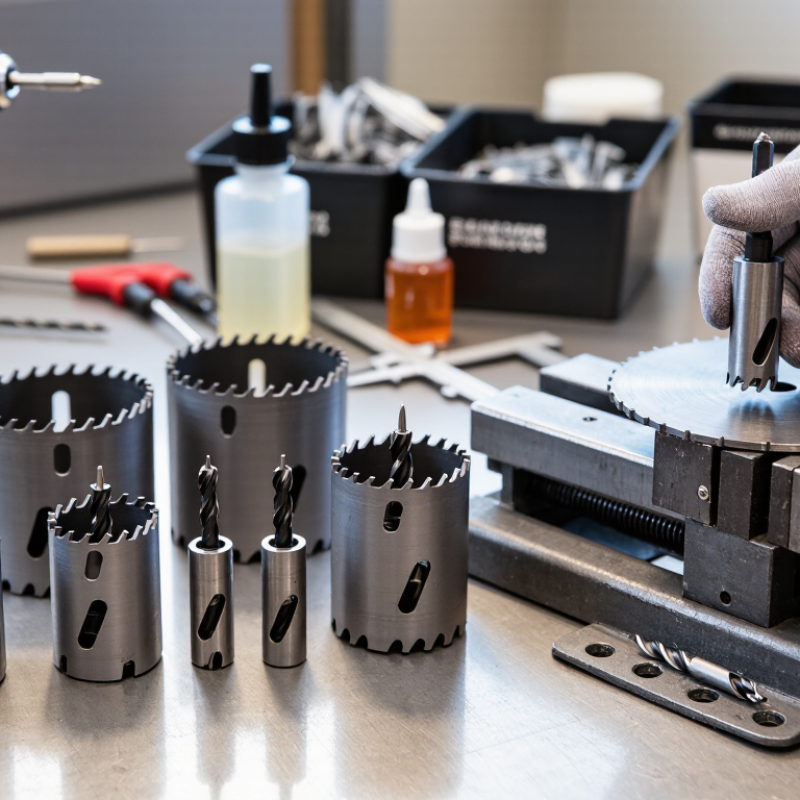
| Hole diameter | Common sizes: 19–152 mm (3/4–6 in). Select a saw that matches the finished hole size; allow clearance for the pilot drill and arbor. | Electrical conduit, pipe pass-throughs, cable entries, sheet-metal access holes, and fabrication work. | Confirm the required hole size before cutting. For large diameters, use a rigid drill or magnetic drill with adequate torque. | Keep the saw concentric on the arbor and check that the mounting thread or adapter is fully tightened. | Replace the saw if the cutting diameter is no longer within the required tolerance or if the body becomes distorted. |
| Workpiece material | Low-carbon steel, stainless steel, aluminum, brass, copper, cast iron, and plastic require different tooth materials, speeds, and lubricants. | Use a general-purpose blade only when its tooth geometry and material are suitable for the workpiece. | Identify the material and thickness first. Avoid treating stainless steel like mild steel because excessive speed can cause work hardening. | Remove chips and dried cutting fluid after each use to reduce corrosion and tooth damage. | Replace the saw when the tooth profile is rounded, chipped, heavily galled, or no longer cuts without excessive force. |
| Bi-metal hole saw | High-speed-steel cutting edge welded to a flexible alloy-steel body; commonly available with variable-pitch teeth. | Mild steel, galvanized steel, stainless steel, aluminum, copper, brass, wood, and composite materials when the manufacturer permits. | Use moderate pressure, steady feed, and cutting fluid for metals. Variable-pitch teeth help reduce vibration and snagging. | Clean the gullets with a brush and inspect the weld area, teeth, and sidewall for cracks. | Replace when multiple teeth are missing, the rim is cracked, or cutting becomes slow despite correct speed and lubrication. |
| Carbide-tipped hole saw | Carbide teeth provide higher wear resistance than standard high-speed-steel teeth but are more vulnerable to impact and misalignment. | Stainless steel, cast iron, hard steel, abrasive sheet materials, and applications requiring longer wear life. | Use a rigid setup and controlled feed. Do not rock the tool or force it through the final wall section. | Inspect each carbide tip for cracks or missing segments. Store separately to prevent edge impact. | Replace immediately if a carbide tip is cracked, loosened, or missing, even when the remaining teeth appear sharp. |
| Tooth pitch | Variable pitch is generally preferred for mixed metal thicknesses and vibration control; finer pitch suits thinner sheet, while coarser pitch suits thicker sections. | Thin sheet metal, structural steel, tubing, and fabrication assemblies. | Choose a pitch that allows at least two to three teeth to engage the material during cutting whenever practical. | Clear packed chips from the gullets. Chip packing increases heat, friction, and the risk of tooth stripping. | Replace the saw if the teeth have become uneven, hooked, polished, or unable to clear chips effectively. |
| Material thickness | Check the saw's rated cutting depth. Many standard hole saws are designed for thin sheet and tubing, while deep-cut models are required for thicker stock. | Sheet metal, box section, pipe, tube, plate, and laminated assemblies. | Clamp the work securely. For thick material, withdraw the saw periodically to clear chips and renew lubricant. | Check the inside wall for chip scoring and confirm that the slug can exit without binding. | Replace or change to a deeper model when the saw bottoms out before completing the hole. |
| Recommended cutting speed | Use the tool maker's speed chart. As a general starting point for a 25–50 mm saw: mild steel about 70–150 rpm; stainless steel about 30–80 rpm; aluminum about 150–300 rpm. | Portable drills, drill presses, and magnetic drills with variable-speed control. | Start at the low end of the range, especially for stainless steel or large diameters. Reduce speed as diameter increases. | Record the successful speed and feed settings for repeat work. Keep the spindle and arbor free from runout. | Do not replace the saw solely because of slow cutting until speed, feed, lubrication, and alignment have been checked. |
| Speed calculation | Spindle speed in rpm ≈ cutting speed in m/min × 1,000 ÷ (π × saw diameter in mm). | Planning repeatable work when a recommended surface-speed range is available. | Example: at 25 m/min with a 50 mm saw, speed is approximately 159 rpm. Round down to the nearest available machine setting. | Verify actual machine speed where possible; overloaded drills may run below their rated speed. | Investigate the machine or setup if speed fluctuates substantially under normal cutting load. |
| Pilot drill | Use a sharp pilot drill correctly matched to the arbor. A common pilot diameter is approximately 6–8 mm, but arbor specifications take priority. | Starting holes accurately in sheet, tube, and plate. | Mark the center, use a center punch where appropriate, and begin with light pressure until the pilot drill is fully engaged. | Replace or sharpen the pilot drill when it wanders, overheats, or produces a rough entry hole. | Replace it when the cutting lips are chipped, blunt, uneven, or smaller than the arbor specification requires. |
| Lubrication | Use a suitable cutting oil or metalworking fluid for steel and stainless steel. Aluminum commonly benefits from a non-staining, aluminum-compatible lubricant. | Metal cutting where heat, friction, and chip welding must be controlled. | Apply enough fluid to wet the cutting edge; reapply during long cuts. Do not flood electrical tools unless the equipment is designed for it. | Wipe off residue after use and store the saw dry. Follow the fluid safety data and ventilation requirements. | Replace the saw if heat discoloration is accompanied by soft, rounded, or severely galled teeth. |
| Workholding and alignment | Secure the workpiece with clamps, a vise, or a properly mounted fixture. Keep the drill perpendicular to the surface. | Thin sheet, tubing, plate, and portable drilling operations. | Prevent the workpiece from spinning. Use a guide or pilot hole when the surface is curved or difficult to position. | Inspect the arbor, chuck, and pilot assembly for runout, looseness, or damaged threads. | Replace the arbor or saw if runout causes visible wobble, uneven tooth wear, or an oversized hole. |
| Feed pressure | Apply firm, even pressure sufficient to produce chips without stalling the tool or bending the saw body. | All metal cutting operations, particularly stainless steel and thin sheet. | Do not force a dull saw. Excessive pressure can strip teeth, deform thin sheet, or overload the drill. | Monitor chips, noise, vibration, and heat. Blue chips or smoke indicate excessive heat or an unsuitable cutting condition. | Replace the saw when normal pressure no longer produces chips and the cutting edge is visibly worn. |
| Breakthrough control | Slow the feed when the saw is close to completing the cut, especially on thin sheet or unsupported material. | Preventing snagging, slug impact, edge breakout, and workpiece deformation. | Support the exit side when practical and release pressure as the final section separates. | Remove the slug with pliers after the tool stops. Never pull a rotating saw away from the workpiece. | Replace the saw if breakthrough repeatedly causes tooth loss because of a damaged or distorted rim. |
| Cleaning after use | Remove chips with a brush or suitable compressed-air procedure; do not use bare hands to clear sharp swarf. | Every cutting operation, especially when cutting stainless steel or abrasive materials. | Stop and isolate the machine before cleaning the saw, arbor, or workpiece. | Brush the gullets, wipe the body, dry the tool, and apply a light rust-preventive coating when appropriate. | Replace the saw if cleaning reveals cracks, missing teeth, severe corrosion, or a loose cutting segment. |
| Inspection interval | Inspect before every use; perform a more detailed check after heavy, overheated, or interrupted cuts. | Workshops, maintenance teams, fabrication operations, and repeat production. | Check tooth condition, pilot drill sharpness, arbor fit, body roundness, and signs of overheating. | Keep inspection records for frequently used sizes and applications. | Remove the tool from service immediately when structural damage or unsafe mounting is found. |
| Storage | Store dry, protected from impact, and separated by size or type. Keep carbide teeth from contacting hard surfaces. | Maintaining cutting accuracy and extending service life between jobs. | Do not leave the saw mounted in a drill where it can be dropped or struck during storage. | Use a case, rack, or individual protective sleeve. Keep cutting fluids and corrosive chemicals away from unprotected tools. | Replace the saw if corrosion has created deep pitting, weakened the body, or damaged the tooth attachment. |
| Safe replacement procedure | Disconnect power, allow the tool to cool, remove the slug, and use the correct arbor key or wrench. | Routine replacement of worn hole saws, pilot drills, and arbors. | Install the replacement firmly, verify compatibility, rotate by hand to check clearance, and test at low speed. | Confirm that the new saw is centered and that the pilot drill projects the required distance beyond the teeth. | Replace before failure when tooth wear, heat generation, vibration, or cut quality indicates the end of useful service. |